Connection to Microsoft Dynamics CRM
How to Connect to Microsoft Dynamics CRM
Connecting to Microsoft Dynamics CRM involves several steps to ensure a secure and reliable connection. Follow the guide below to successfully set up the connection.
Before you begin, make sure you have the following prerequisites in place:
-
Microsoft Azure Account: You need access to a Microsoft Azure account with the necessary permissions to create and manage applications.
-
Access to Your CRM Instance: Ensure you have access to the Microsoft Dynamics CRM instance you intend to connect to.
Step 1: Register an OAuth App in Azure Active Directory
- Log in to Azure Portal:
Go to Azure Portal and log in using your Microsoft credentials.
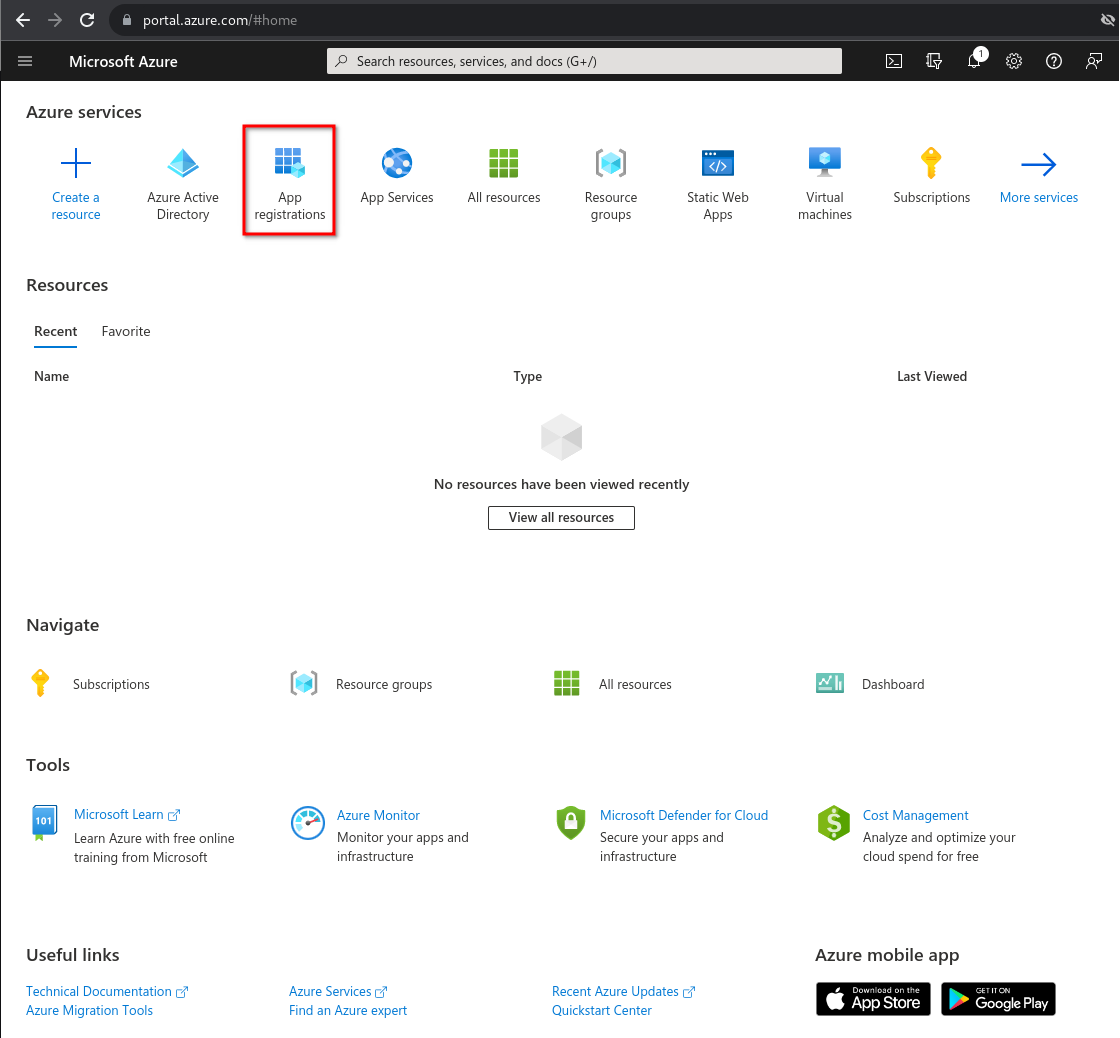
- Access App Registrations:
Select App registrations in the Azure Portal.
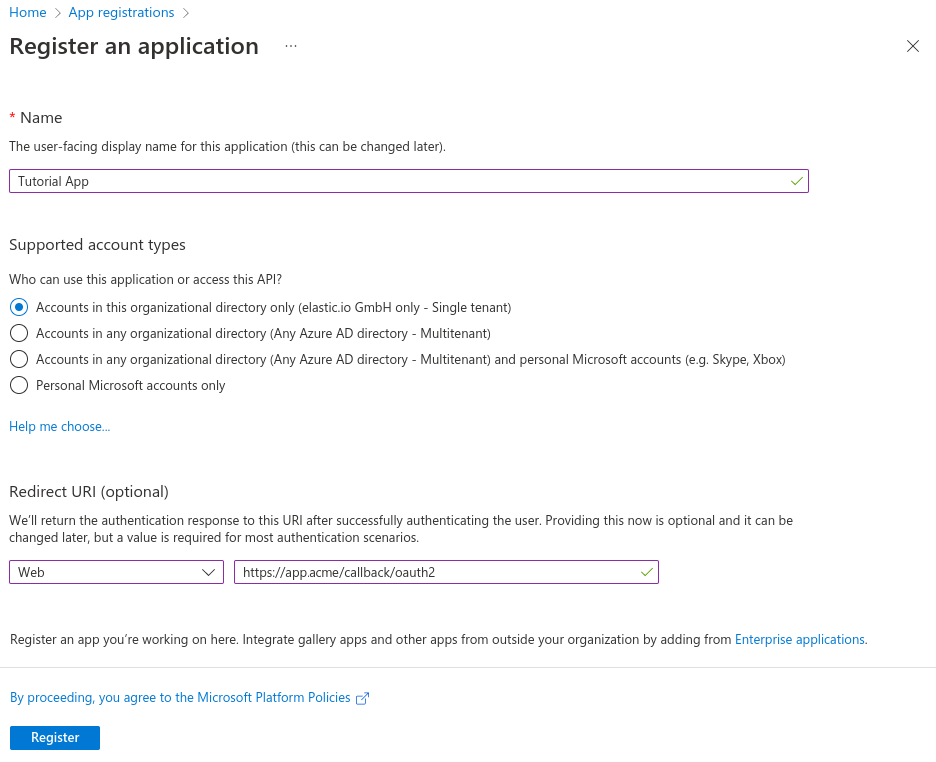
- Create a New Registration:
Click on New registration.
- Enter Registration Details:
Fill in the following information:
- Name: Choose any name for your registration.
- Supported account types: Select “Accounts in this organizational directory only.”
- Redirect URL:
- Platform: Choose Web.
- URL: Enter
https://your-tenant-address/callback/oauth2.
Step 2: Add CRM Permissions to the App
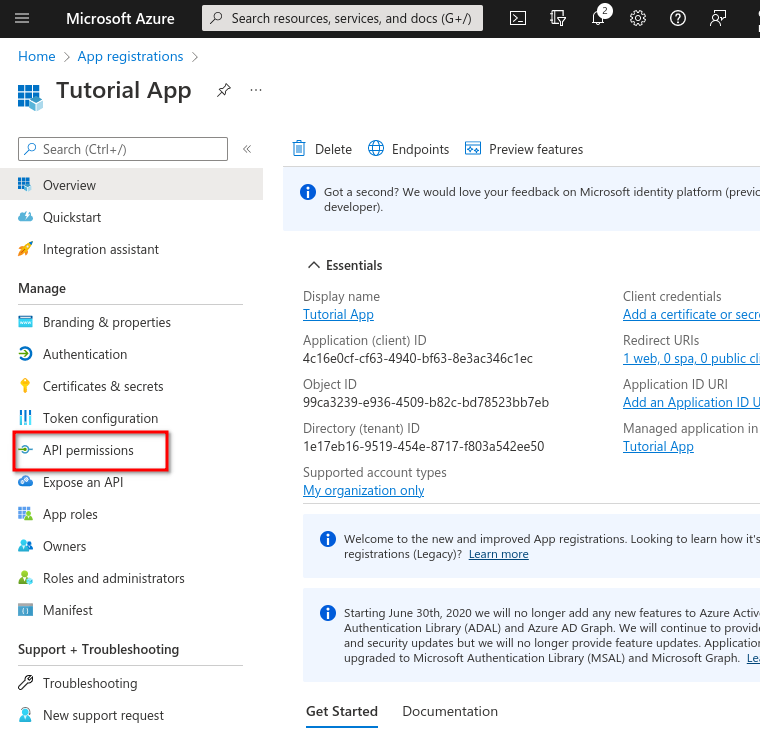
- Access API Permissions:
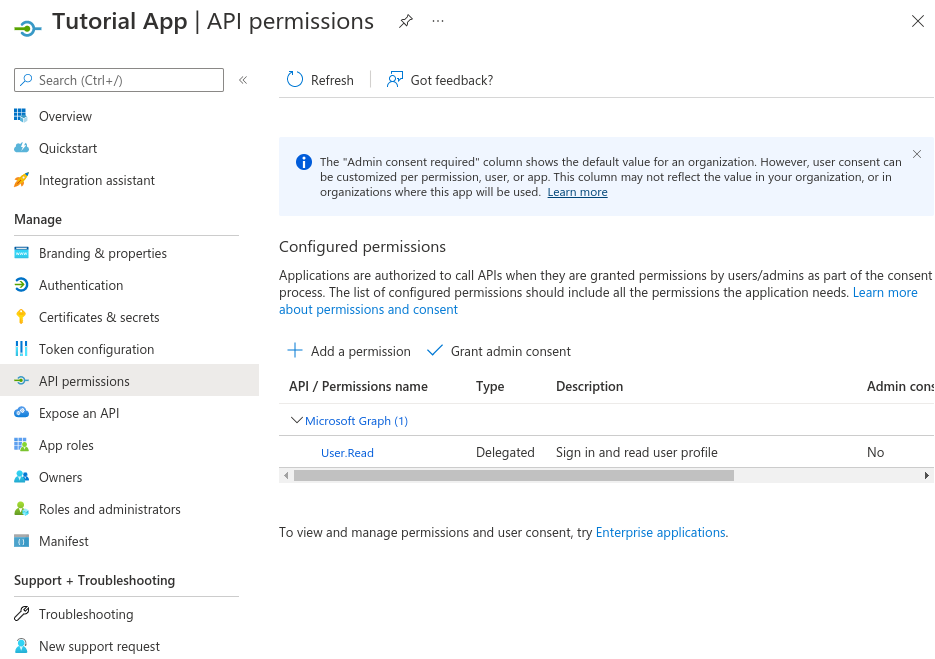
Click on API Permissions.
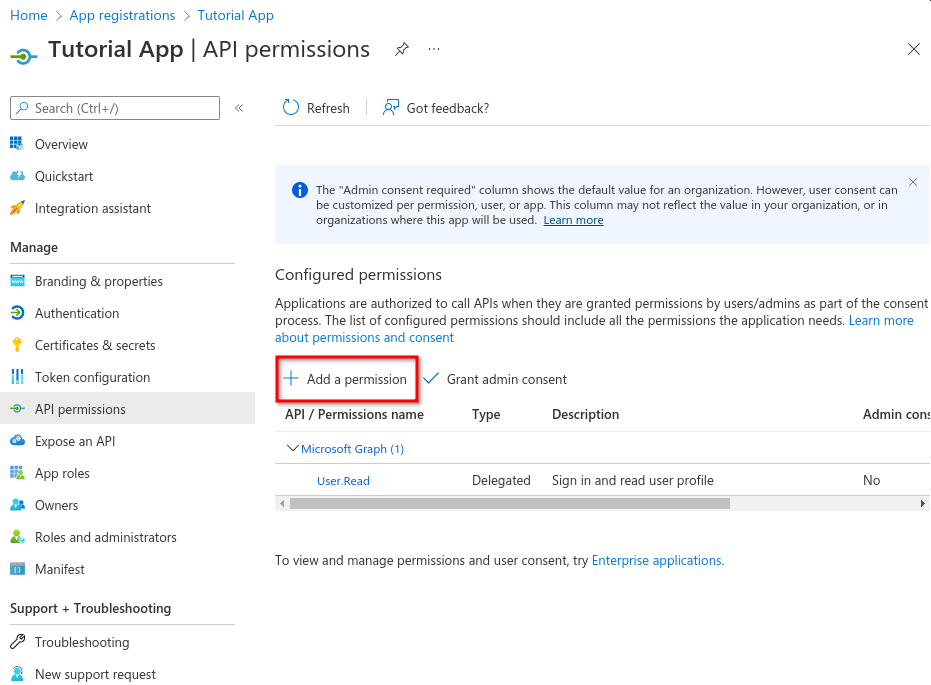
- Add a Permission:
Click Add a permission.
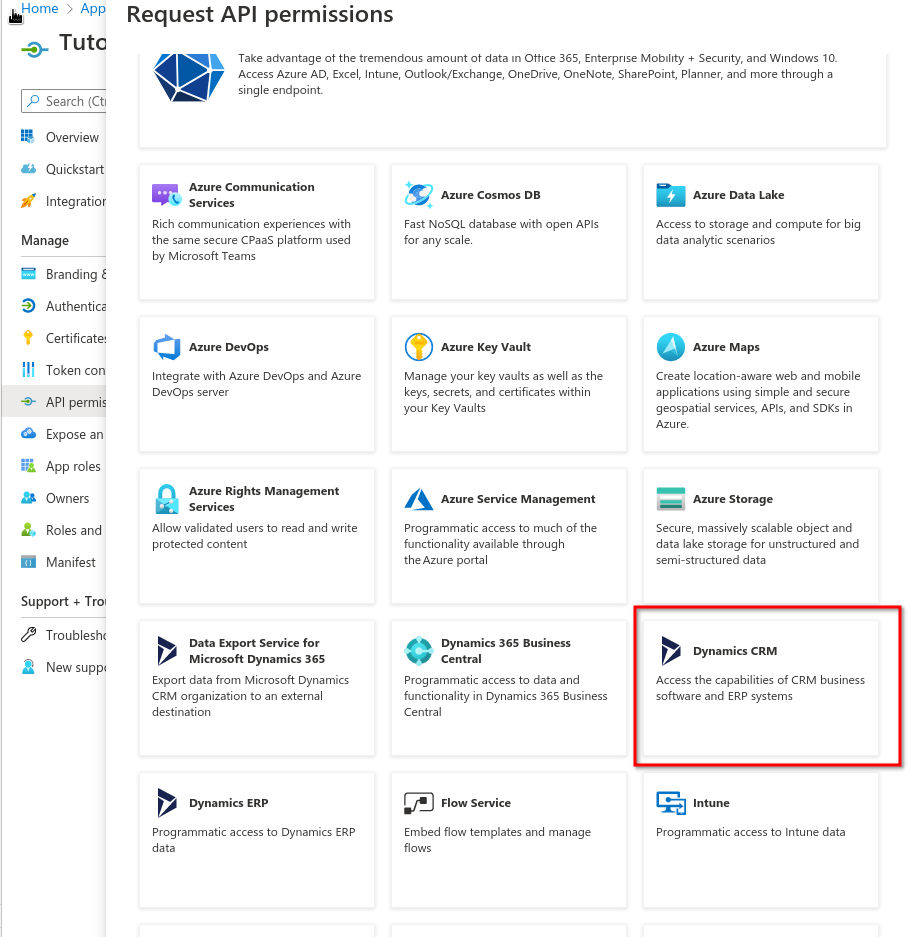
- Select Dynamics CRM:
Search for and select Dynamics CRM.
- Choose Permissions:
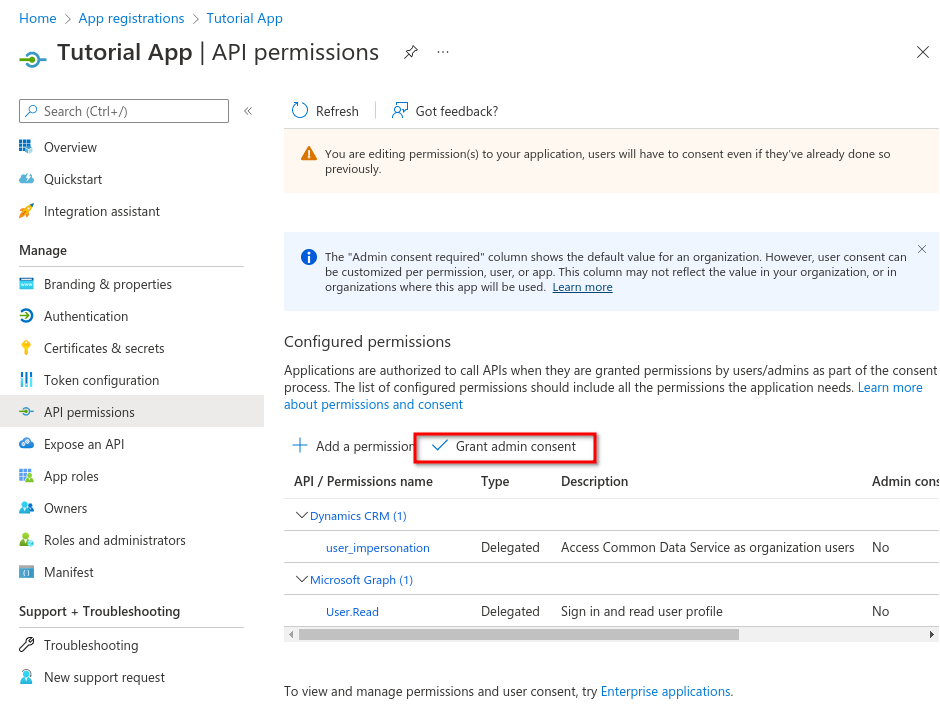
Check the user_impersonation checkbox and click Add permissions.
- Grant Admin Consent:
Click Grant admin consent and confirm by clicking Yes.
Step 3: Generate a Secret for the App
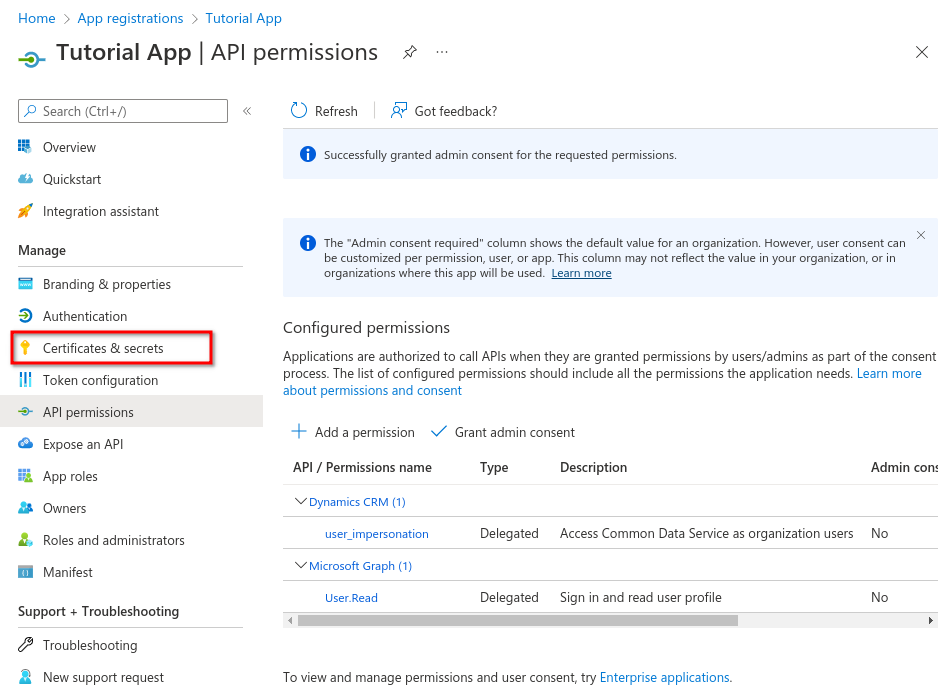
- Access Certificates & Secrets:
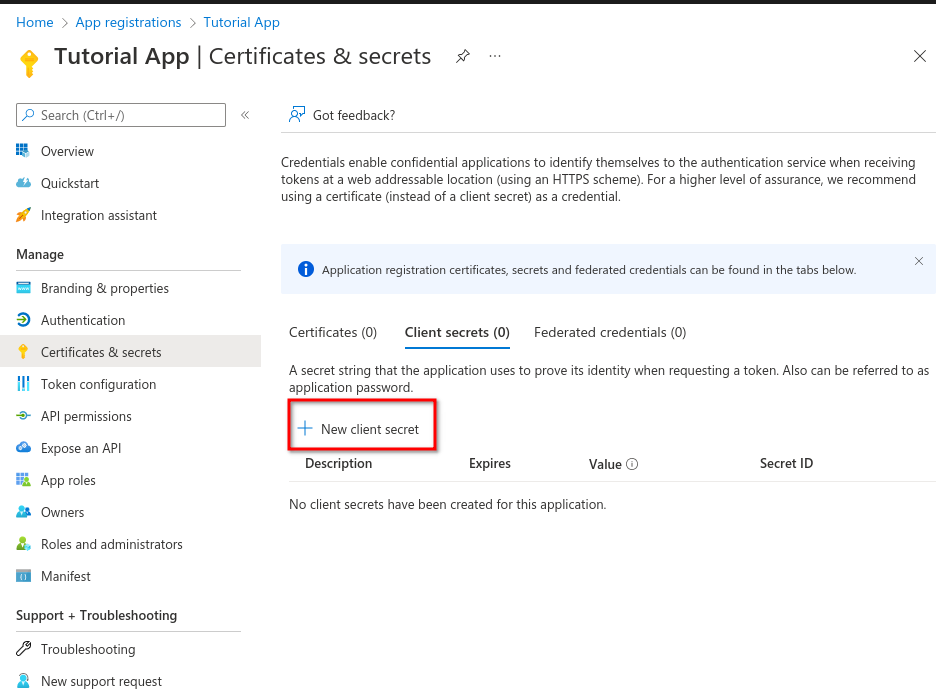
Click on Certificates & secrets.
- Generate a New Client Secret:
Click New client secret.
- Enter Secret Details:
- Provide a description for the secret and select the desired expiration period (maximum 24 months).
- Click Add.
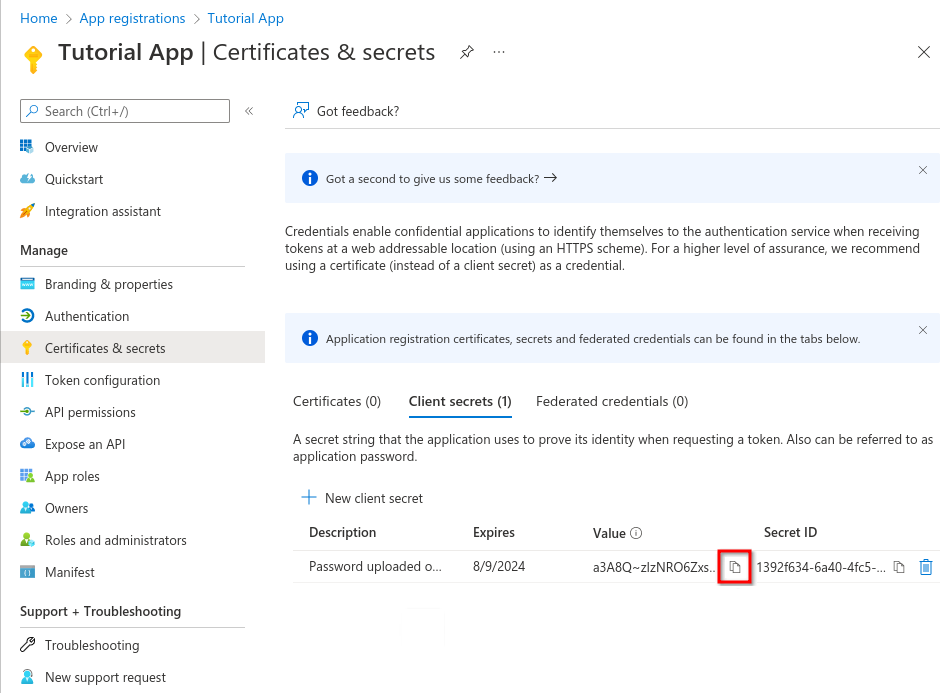
- Save Secret Value:
- Save the value displayed in the Value column. You will need this when creating an Auth Client on AVA platform.
Step 4: Create an Auth Client on Your Platform
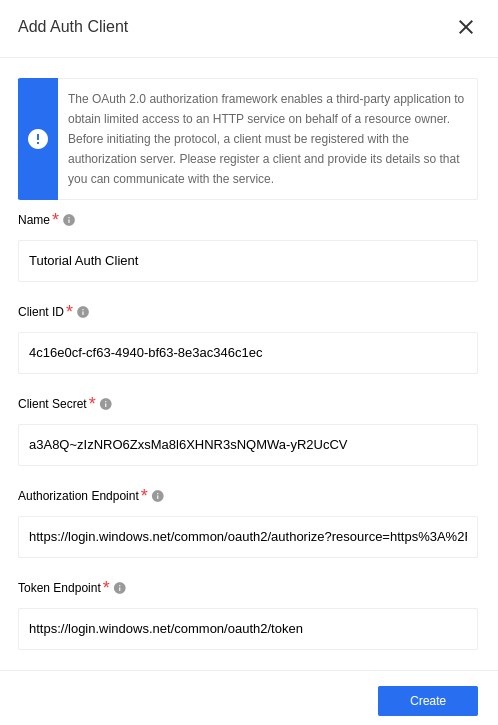
- Create a New Credential:
Create a new credential on AVA platform for connecting to Microsoft Dynamics CRM.
- Configuration Details:
- Fill in the following details:
- Name: Provide a name for this credential (free text).
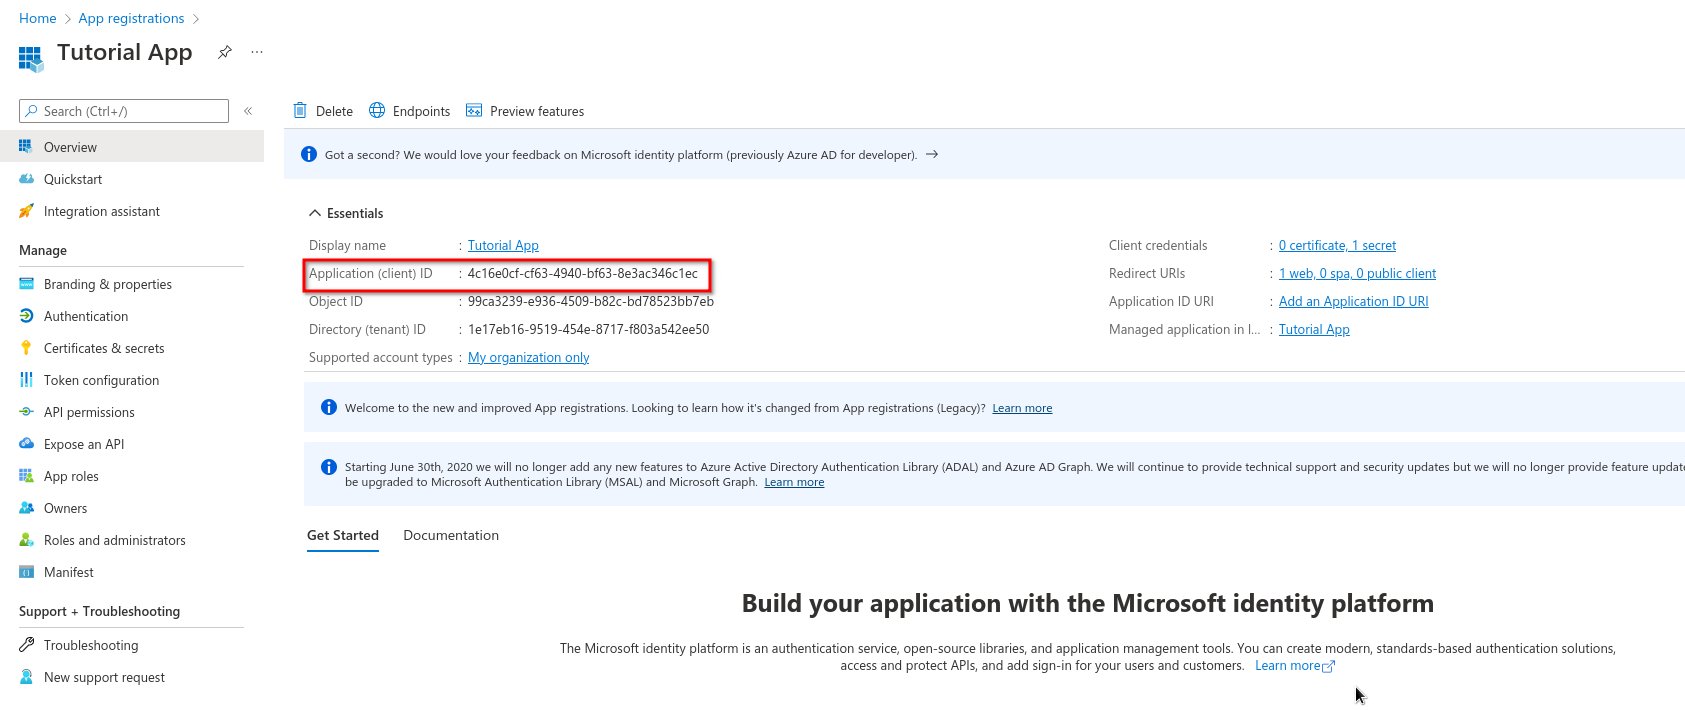
- Client Id: Use the Application ID copied from Microsoft Azure -> API permissions -> Application ID.
- Client Secret: Add the client secret generated in the previous step.
- Authorization Endpoint: Set it to
https://login.windows.net/common/oauth2/authorize?resource={ URL encoded URL of CRM instance }. For example, if your CRM instance URL ishttps://orgfb974624.crm4.dynamics.com/, the encoded URL becomeshttps%3A%2F%2Forgfb974624.crm4.dynamics.com%2F. - Token Endpoint: Set it to
https://login.windows.net/common/oauth2/token.
That’s it! You’ve successfully configured the connection to Microsoft Dynamics CRM using OAuth. Make sure to test the connection on your platform to ensure it’s working as expected.
Please Note: To maintain a smooth experience, we recommend reusing stored credentials where possible. Duplicating secrets across OAuth clients can result in errors and complications.
